Rag Quilt

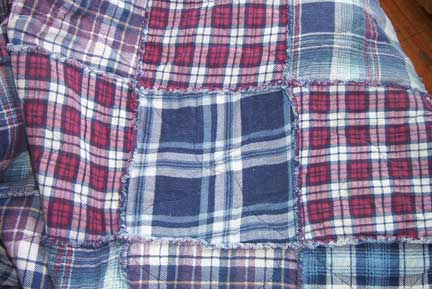
Rag quilts have to be the easiest to make and are a great way for beginner quilters, both young and adult, to get started. If you are looking for instant gratification, this is it!

Important things to keep in mind:

1. What makes a rag quilt? The frayed edges of the joined blocks. So the best fabrics to use are those that will fray easily, such as flannel, homespun, or denim.

2. For your filler or middle layer, use thin batting, flannel... or nothing at all! If you are using denim, you probably want to omit using a middle layer, or your quilt will turn out very heavy.

3. YOU decide the size of your quilt. Your blocks can be any size you like. You probably don't want to go too small, but anywhere from 4 to 10 inches will look really great.

4. You will be cutting the top and back blocks the same size. If you use batting or flannel as your middle layer, you will be cutting that piece smaller. And you will sandwhich each block and quilt it before you assemble your quilt.

Let's get started!

1. In my example, I am using flannel for the top and back, and batting for  the filler. Once again, this is a matter of personal preference.

2. The instructions given here are for a 56 x 72" lap quilt, but you should feel free to adapt to whatever block and quilt size you would like.

3. For my lap quilt I am using 8" finished size blocks: 7 across and 9 rows down. This gives me a total of 63 blocks. Since I am using flannel for both my top and back, I will cut twice that number: a total of 126 squares.

rag quilt tutorial

4. SEAM ALLOWANCE: Cut your squares at least 1/2" to 1" larger on all edges than the finished size you desired. The amount of fraying on your quilt will depend on how wide your seam allowance is. In our example, I would cut my squares 9 to 10" in size, for a finished 8" block.

5. BATTING: For our lap quilt, cut 63 squares of batting 8" big (the same as the finished size desired).

6. Center and sandwich the batting between two squares of flannel (wrong sides together), as indicated in the photograph below.

rag quilt tutorial

7. Quilt the block - this can be a simple X  or loose meandering.

rag quilt tutorial

8. Once you have quilted all your blocks, join them in rows. Join blocks WRONG sides together, with the raw edges towards the front, using a 1/2" t0 1" seam (depending on how large you cut your blocks).

rag quilt tutorial

9. Sew your blocks into rows, and then join the rows together, matching the seams. After you have joined all your rows, sew an 1/2 to 1 inch inside the outer border all around the quilt.

10. Clip the seams: With sharp scissors snip into the seams, being careful not to cut into the seam. Make a cut every 1/4 - 1/2 inch. Once you finish clipping the seams, snip the outer edges the same way.

11. Wash to fray:  If you don't have a washing machine with a good lint filter, you may want to go to a commercial laundromat for this part. If doing this at home, make sure to check and clean your lint filter on both the washer and dryer several times. Run the quilt through a long cycle of washing and drying. This will make the edges soft and frayed. The more you wash and dry it, the more ragged it will become.

rag quilt tutorial

My Dream House
Angie's Blog
EQ