Day 1: Cutting the background blocks & first ten cats
PLEASE READ THROUGH ALL THE INSTRUCTIONS, ALL THE WAY DOWN TO THE BOTTOM OF THE PAGE!
***************************************************
1. CHOOSING THE BACKGROUND FABRICS:
Let's start by deciding what fabric we would like for our background blocks. And it can be anything you like.
There are five different cat designs, so you could decide on one fabric for each design, or mix and match to your heart's content. Even better, go completely scrappy and use up any fabric you would like to use up. Scrappy is great!
In my case, I actually settled on seven different fabrics I wanted to finish using up:
![]()
So go ahead, go through your stash and decide what fabrics you would like to use.
2. CUTTING THE CAT BACKGROUND BLOCKS:
a. Depending on the applique method of your choice, you might want to consider cutting your background squares a little larger and then trim them down after you finish appliqueing and embroidering the cat heads. I suggest you cut the squares at 7½ inches, and after appliqueing trim them to 6½ inches.
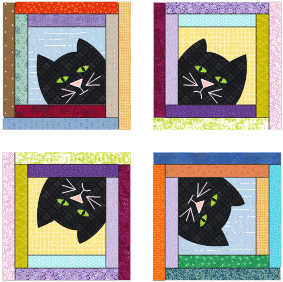
b. This little lap quilt is made up of 25 blocks: 5 across and 5 rows. However, you can always make more blocks for a larger quilt, if you like. Under today's page title you will find the link for a pdf file with layouts for this lap sized quilt, and for a larger twin sized quilt, should you like to make your quilt a little larger.
The file includes a suggested fabric requirement chart, and the first two cat head designs.
3. APPLIQUEING THE FIRST TWO CAT DESIGNS:
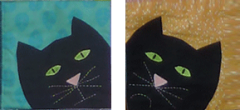
The only real difference between these two blocks is the rotation and the mouth. The first is what I call my "non-committal" cat, and the second one is rather unhappy. Standoffish... you know how cats are.
Sew 5 of each design. When it comes time to join the blocks, you can decide on the rotation of each block.
As to applique methods, go with what you most enjoy doing. For my quilt I decided on a turned edge machine applique method using freezer paper and starch. Have you ever tried this technique? If not, here is a tutorial on how to do it:
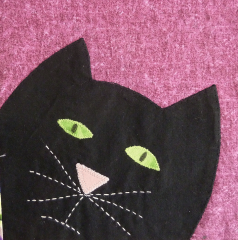
4. Embroidery tips and what to do with those eyes:
You can free stitch the mouth and whiskers by machine, if you like. Or, hand embroider using 4 strands of embroidery floss in a light color (I suggest white, or pink/peach, or light blue) and a simple running stitch.
For the eyes, I decided to use fabric markers for the black pupils. You could also embroider them, if you prefer. Whatever makes life easier for you!
Ok, so let's get going! To recap, this is your task for today:
1. Cut 25 background squares.
2. Applique 5 each of the first two cat designs - 10 blocks altogether.
3. You will find the link for pdf file with the yardage requirements, layout guide, and first two cat blocks at the top of this page, right under the title.
****************************************
DON'T FORGET!
Follow me on Instagram @angiesbits and post your progress pics to #blackcatquiltsewalong OR on Facebook at Angie's Bits 'n Pieces OR, if you prefer, post your pics on my Black Cat Quilt Pinterest Board
Let's see those photos! And let's have fun!